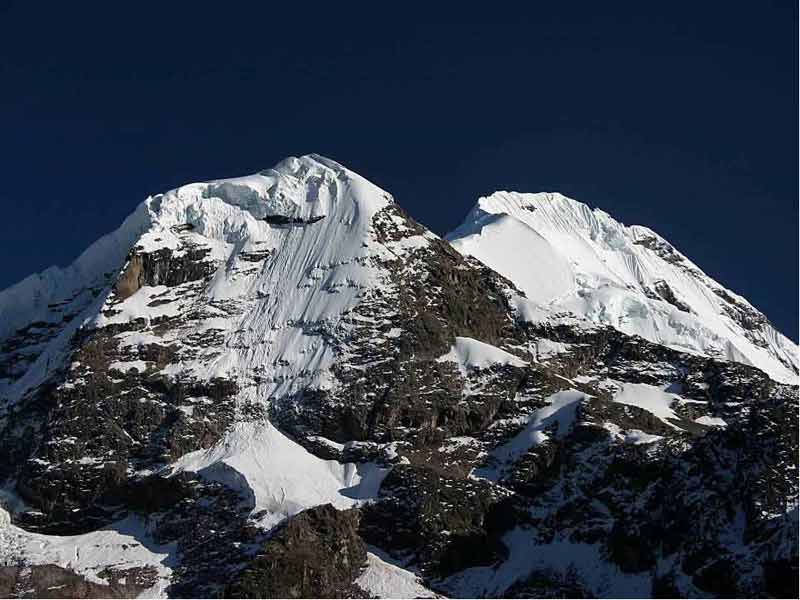

Mountain Scenery
With the fabulous mountain scenery in Peru it is important to include some visual clue to indicate the magnitude of these outstanding mountain peaks and ranges. Putting foreground subjects like a person or wildflowers helps heighten the feeling of "presence" in these dramatic landscapes. Use a wide-angle lens (24mm to 35mm) or wide-zoom setting, although, a wide-angle shot can diminish rather than increase the size of the mountains.
You can use a moderate telephoto lens with a middle-ground subject for scale, such as a tree or house to increase the grandeur of the mountains. A telephoto lens compresses the space between the foreground or middle ground and background therefore enhancing the visual size of the mountains. Aerial perspective is exaggerated by using a telephoto lens. With this atmospheric haze each layer of distant peaks appear lighter in tone and color. This density change is perceived by the eye as distance which emphasizes the scale of the scenery.
To get your very best photographs at very high altitudes, the best time is just before sunrise, or after sunset because the phenomenon called alpenglow is present. This is a crimson glow that emerges when blue light is scattered by the atmosphere and a predominant red light ignites peaks in warm hues. This phenomenon also illuminates the clouds around the mountain peaks.
The angled light of dusk and dawn also gives texture, depth, and three-dimensional form to the mountains. Also, before and after a storm is a great time to take pictures— look for shafts of sunlight breaking through the clouds and peaks disappearing in the atmosphere of the scene.
Your light meter can be tricked into an underexposure by excessive light reflecting from haze, mist or snowfields. When you believe this is happening you can compensate by turning your exposure meter to overexpose by a full stop or bracket in full stops. At high attitudes there is an excess of ultraviolet light which produces a haze. Sometimes you can use this to your advantage, but if it is getting in the way of your subject, you can use a filter over your SLR lens. A UV or skylight filter (81B or 81C) will absorb some of the excess. A polarizing filter is probably the best thing to use in this case.
Rainforests
In the rainforest it is more effective to capture close visual vignettes like ferns flowers, waterfalls, or even birds and animals where you will need a long lens (135mm to 200mm) to get close views. If you attempt a broad view your likely to get a green mass with very little detail or feeling of scale. The treetop canopy causes the light to be dim, spotty and contrasted. A tripod and/or fast film will help this problem and for those close-up subjects use a flash fill.
Because of the humidity and moisture you will need to keep your cameras packed in self-locking plastic bags that contain desiccant (silica gel packets). Store your film in a vapor-proof plastic canister and return it there immediately after use.

Interesting Faces
You can find interesting faces by wandering in markets and city parks and will have to work candidly and unobtrusively. A moderately long telephoto lens (an 80mm to 200mm zoom) will enable to to remain at a distance. Work politely from afar and do not appear sneaky. If your subject spots you simply smile and turn the camera away or start a conversation and ask him or her to pose for you.
If your posing someone, frame the scene tightly to take in just the head and shoulders, and keep a deep direct eye contact with your subject. Allow the person to be shy, pensive or curious instead of encouraging a person to smile. The best background is either simple or out of focus. A technique to try is to control the depth of field by using a large aperture and selective focus to cast the background into a soft blur. Try to pose your subject in the shade because soft and even lighting is the most flattering. Bright light causes strong shadows in the eye sockets and can be improved with a flash fill.
Try to put yourself in their shoes when trying to catch a candid shot. Try to make contact and establish a rapport. Ask permission first and respect their wishes if they refuse.
Group Portraits
Arranging a natural pose is difficult in photographing a group. Do not line them up in rows but seat them on stairs, a grassy hillside or around a picnic bench. Try to keep them lightened up and in an at-ease pose. Tell a joke or tell a silly situation on your trip.
In group portraits lighting is very important, pose your group in a large area of open shade. If you are forced into working in harsh sunlight that causes shadows that obscures their faces, use the flash-fill mode that is built into your camera to open dark spots. A wide angle lens will help you to work closer and get more people into the frame but do not allow much background into the shot.
Cultural Expeditions Peru offers:
Photo tips to make the most of your travel to Peru.
Customized luxury group Tours to Peru.
Travel to Peru's Spanish and Andean history, archaeology, arts and culture.
Travel packages tailored to your interests with expert, scholarly and knowledgeable trip leadership.